Forms
Welcome to Forms — a powerful new way to generate, qualify, and convert leads directly inside SAGA. Follow this guide to create your first form step by step.
Last updated 4 months ago
✨ Forms Overview
Smart, high-converting forms:
Create clean, focused forms that make it easy for people to reach out, request info, or take the next step—without friction.
Lead generation + qualification:
Every submission captures not just contact details, but also key answers that help you understand who the lead is and how interested they are.
Instant CRM sync:
As soon as someone fills out a form, their data is automatically saved inside your SAGA CRM, fully organized and ready to follow up.
🎯 Main Benefits
Generate leads with real intent, not just clicks
Qualify prospects before you even talk to them
Automate data collection and save hours of manual work
Focus your energy on the right people
How Does It Work?
When someone fills out and submits a Form:
A contact is created (or updated) in your SAGA CRM
You’ll see exactly which Form they used, both:
on their contact card
inside the activity panel
Forms give you context — not just contacts.
🛠️ What You Can Do with Forms
You have multiple ways to use Forms in SAGA:
Use pre-made Forms as they are
Duplicate existing ones and customize them
Create your own from scratch
Option 1: Pre-Made Forms
SAGA includes ready-to-use Forms you can start sharing immediately.
Where do they come from?
On the Forms page, you’ll always find a dedicated tab with existing Forms:
If you’re part of a team, these may have been created by your team
If you’re not in a team, you’ll see default templates provided by SAGA
Can I Use Them Without Editing?
Yes — and this is the important part.
Even if you don’t edit anything, these Forms are already:
Connected to your profile
Shared through a personal URL
Linked directly to your CRM
This means that every submission will appear in your Contacts page, exactly like any other form you create.
No extra setup required.
👀 Preview Before You Share
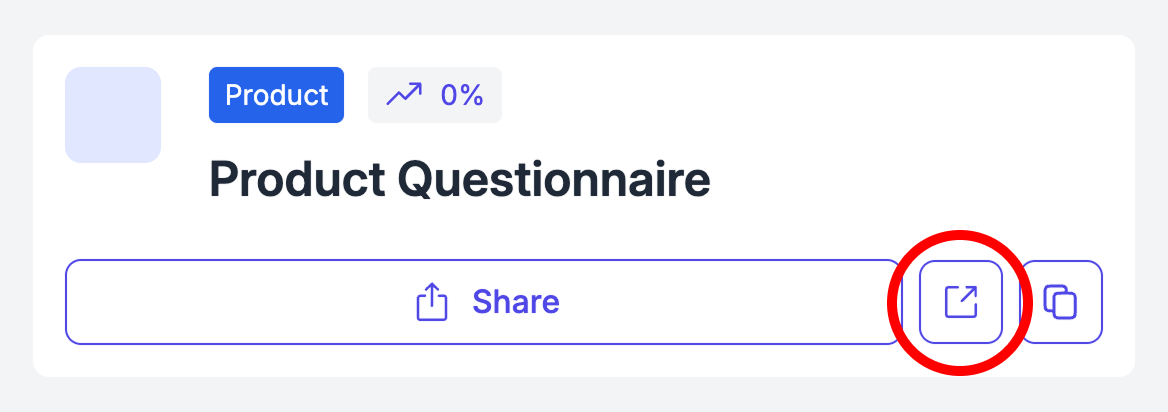
To check a Form before sharing it publicly:
Click the External Link button to open the preview version of the Form
The Form will open with a yellow banner at the top, indicating that you’re in preview mode
In preview mode:
You can fill in the Form to test it
No data will be saved
No contacts or answers will be collected
This allows you to safely test the Form and see exactly how it looks for visitors.
⚠️ Important
When you’re ready to share the Form with others, make sure to use the Share button.
The preview link (with the yellow banner) is only for testing — submissions there will not be stored.
Option 2: Duplicate & Customize
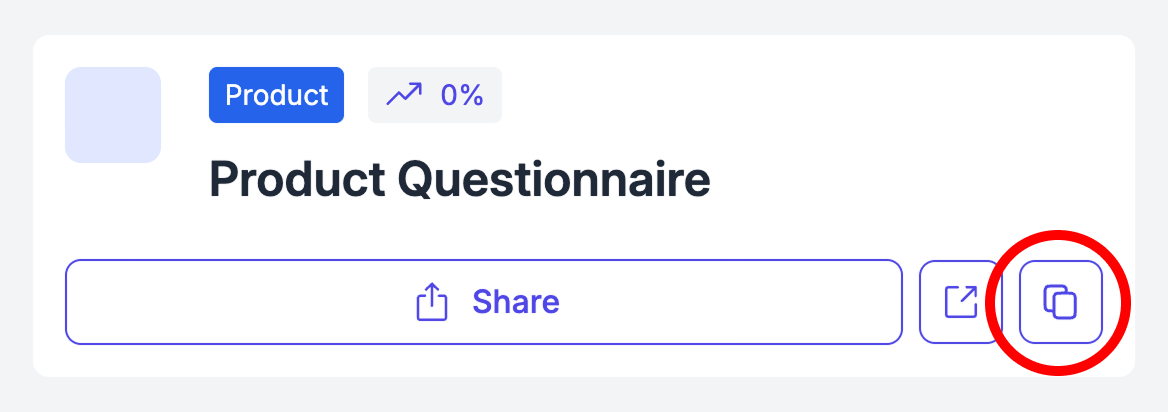
If you like a pre-made Form but want to adapt it:
Duplicate it
Use it as a starting point
Edit fields, text, or structure
This gives you flexibility without starting from zero.
Option 3: 📝 Create a Your Own Form
1. Create New
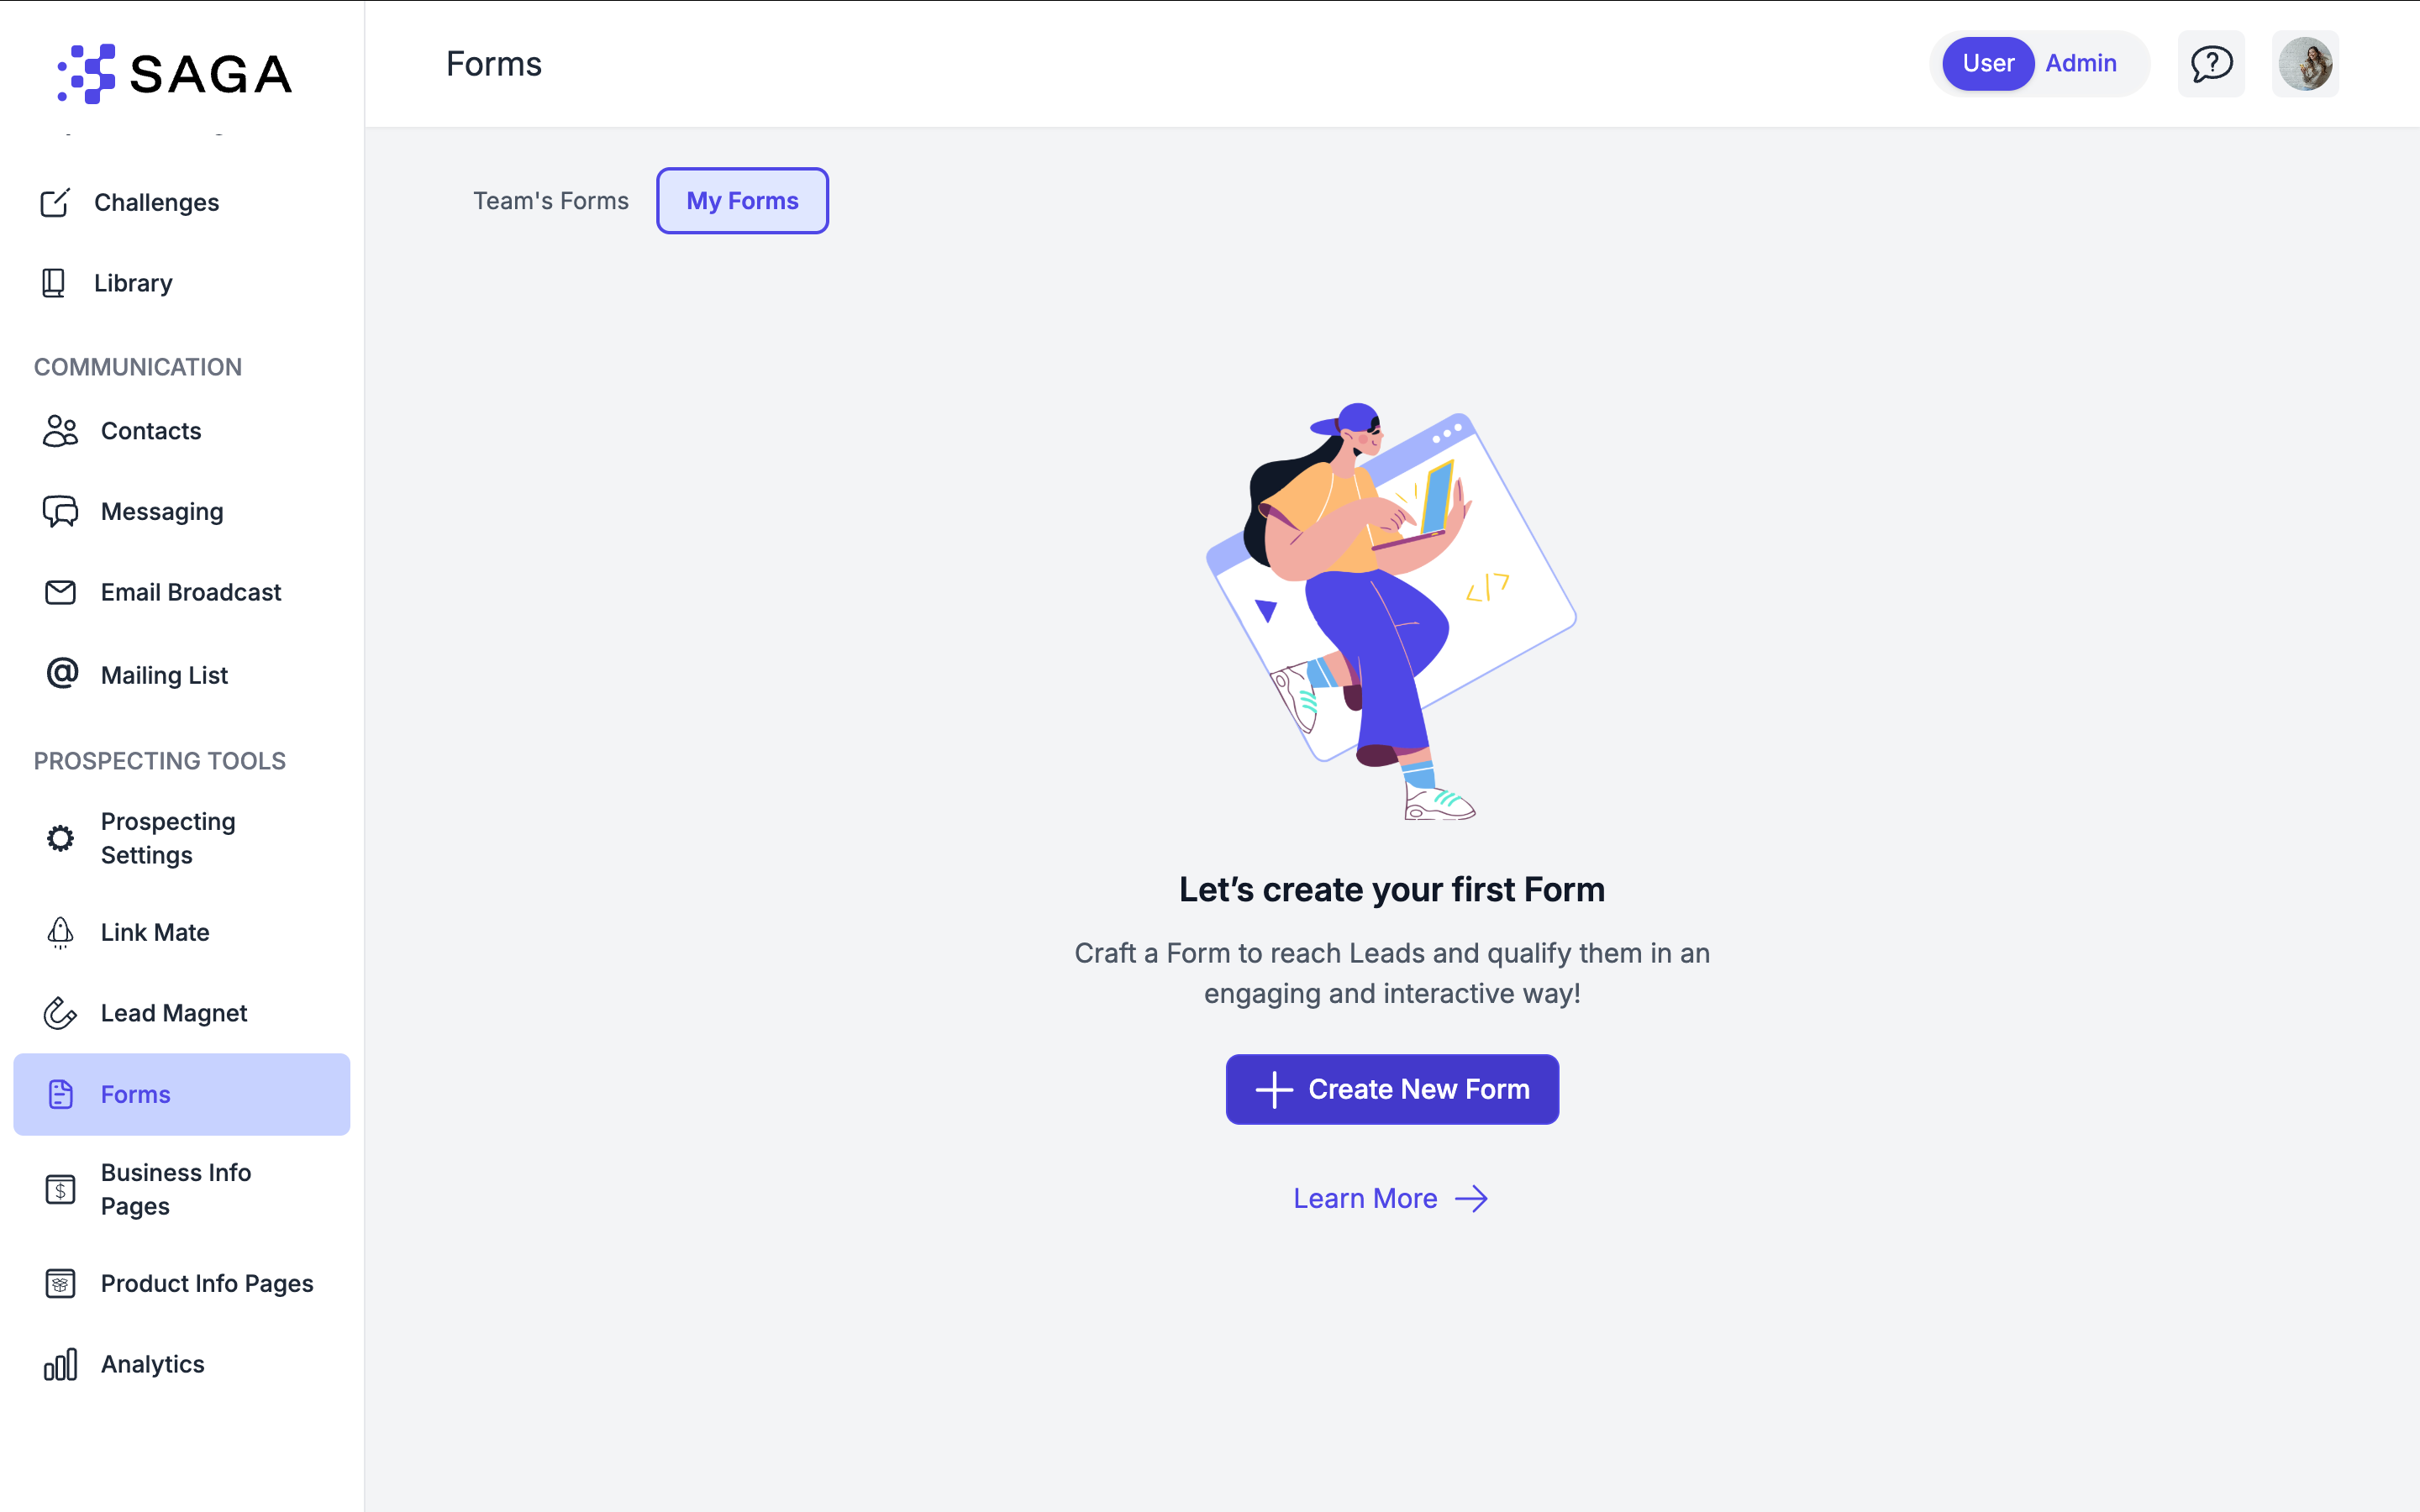
Go to Forms page.
Click “+ Create New Form”.
Give your form a title and customize the end of the URL. Choose a short, unique text that will appear at the end of the URL. It should describe your form and use only lowercase letters, numbers, and hyphens.
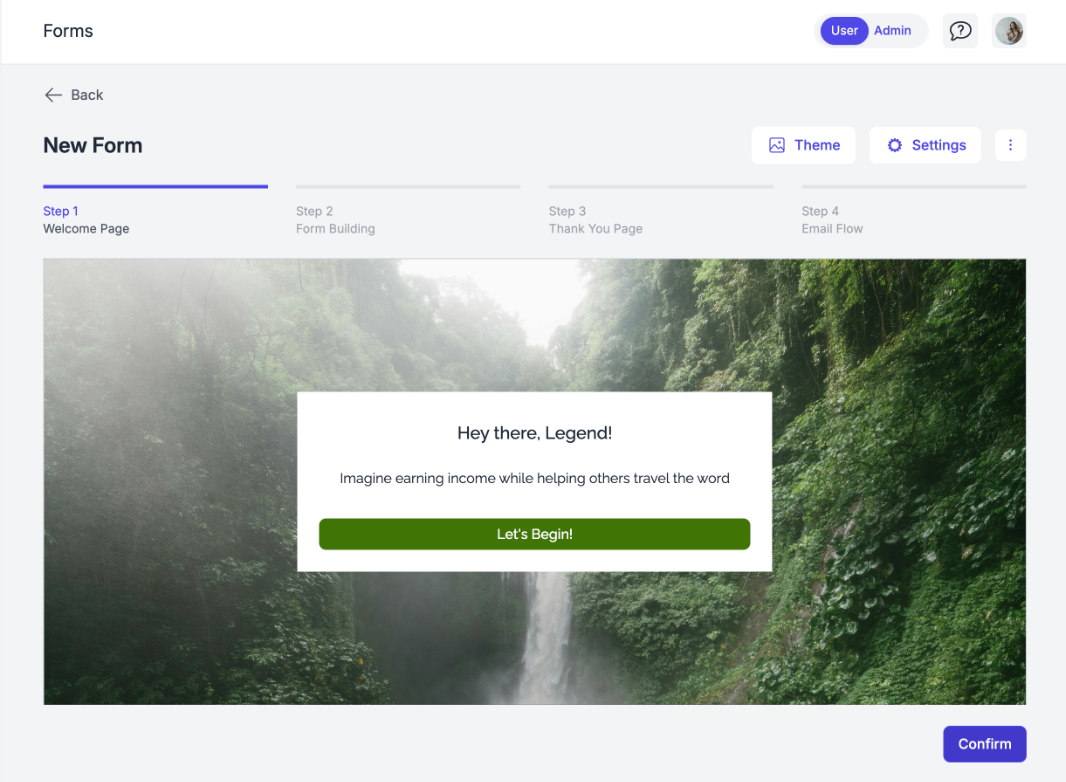
👋 2. Set Up the Welcome Page
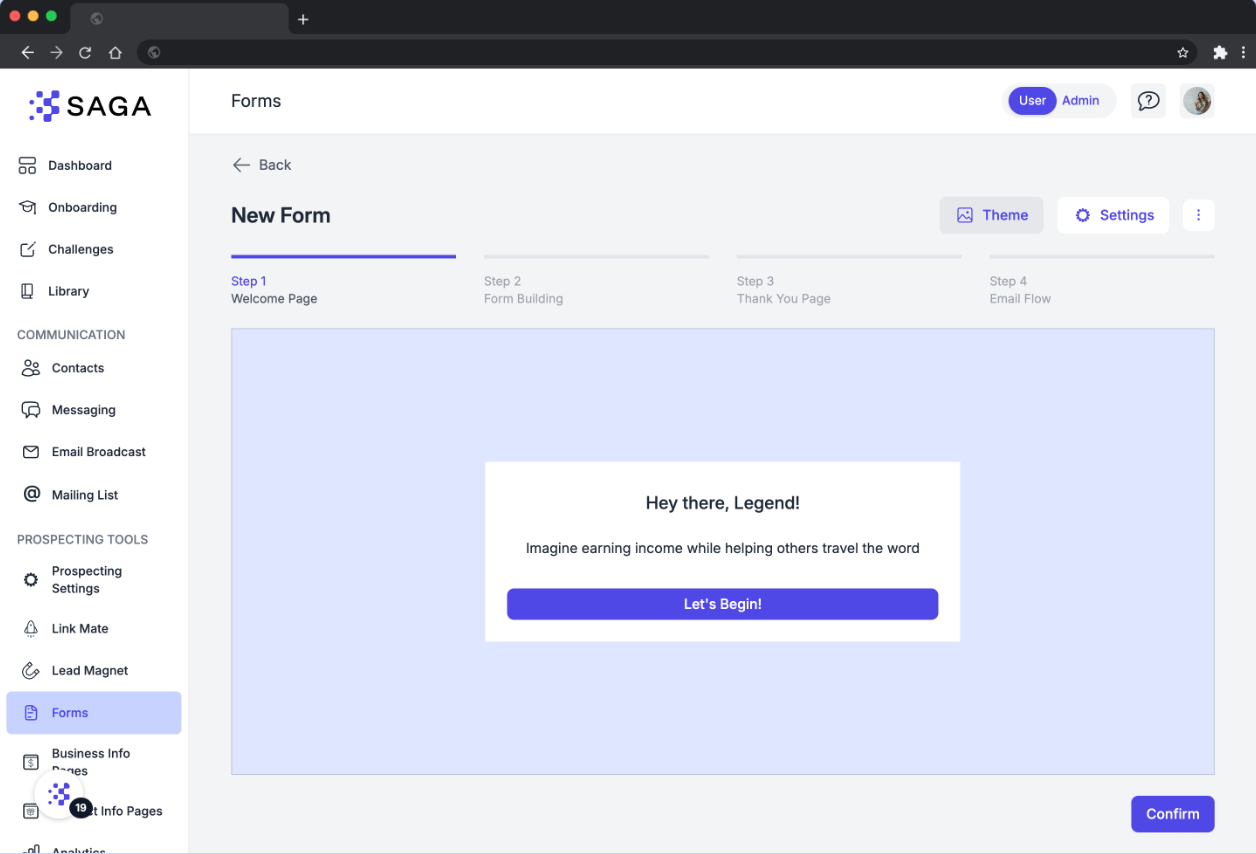
Your welcome page is the first thing visitors see.
Add a headline and intro text to set the tone.
Edit the call-to-action (e.g., “Start Now”).
✅ Tip: Make it warm, short, and clear — this is what convinces people to start filling it in.
🖌️ 3. Customize Your Theme
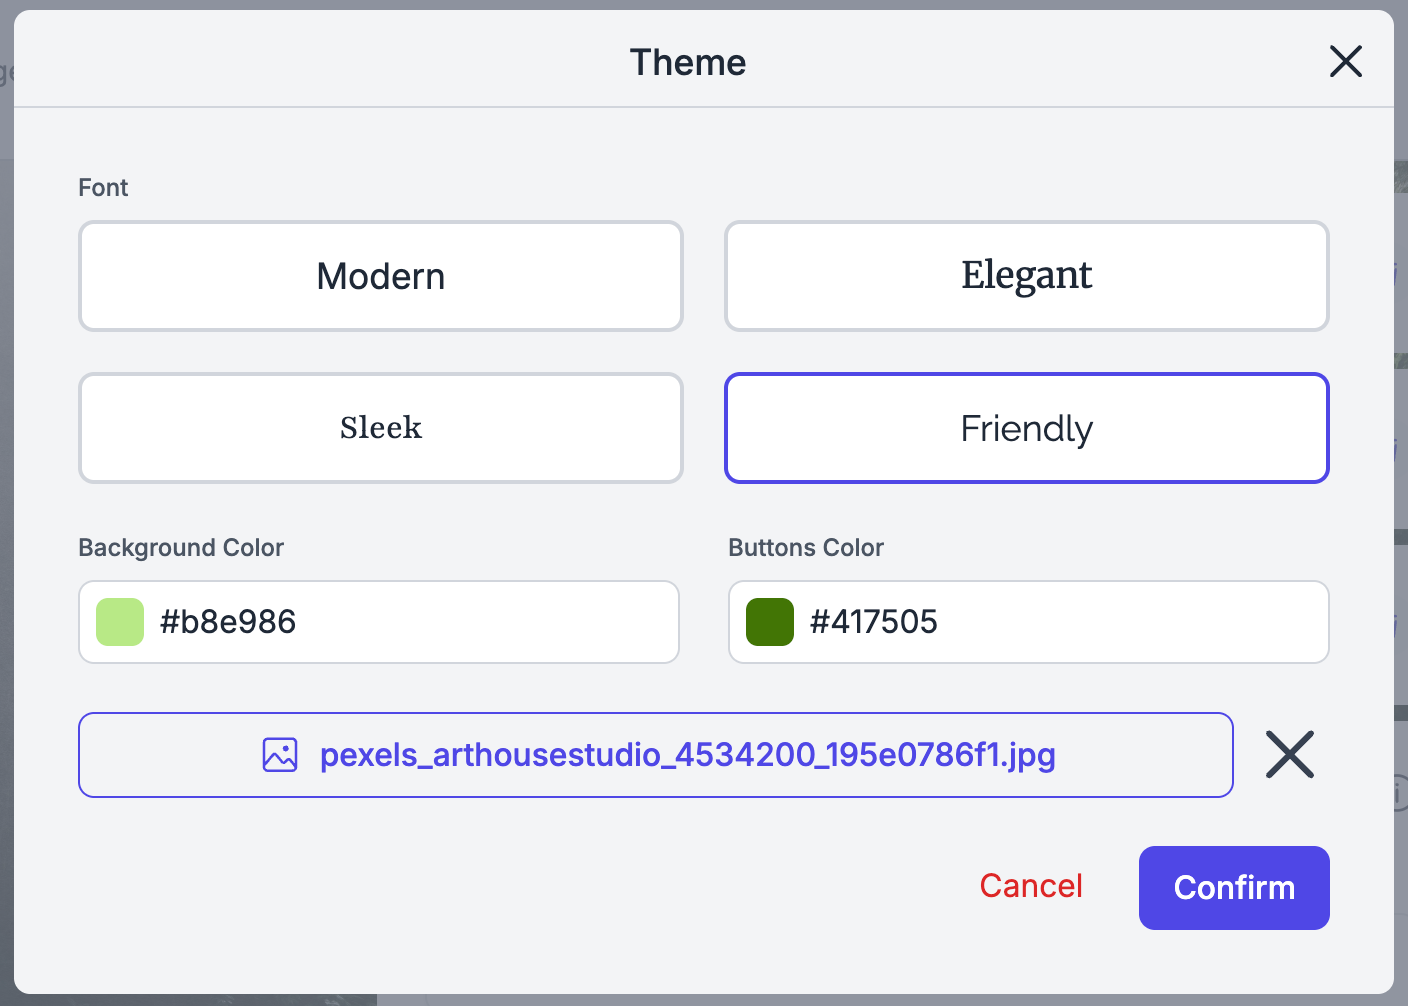
Click on “Theme” on the top right.
Choose your font theme
Set your button colors (or enter a custom hex)
Edit the background color or upload a background image image
Preview changes in real time.
Make a beautiful form match your brand:
When you’re done editing the theme & the welcome page, click on “Confirm” in the bottom right.
❓ 4. Add Questions to Your Form
Click “Add Question” to build your form. You can:
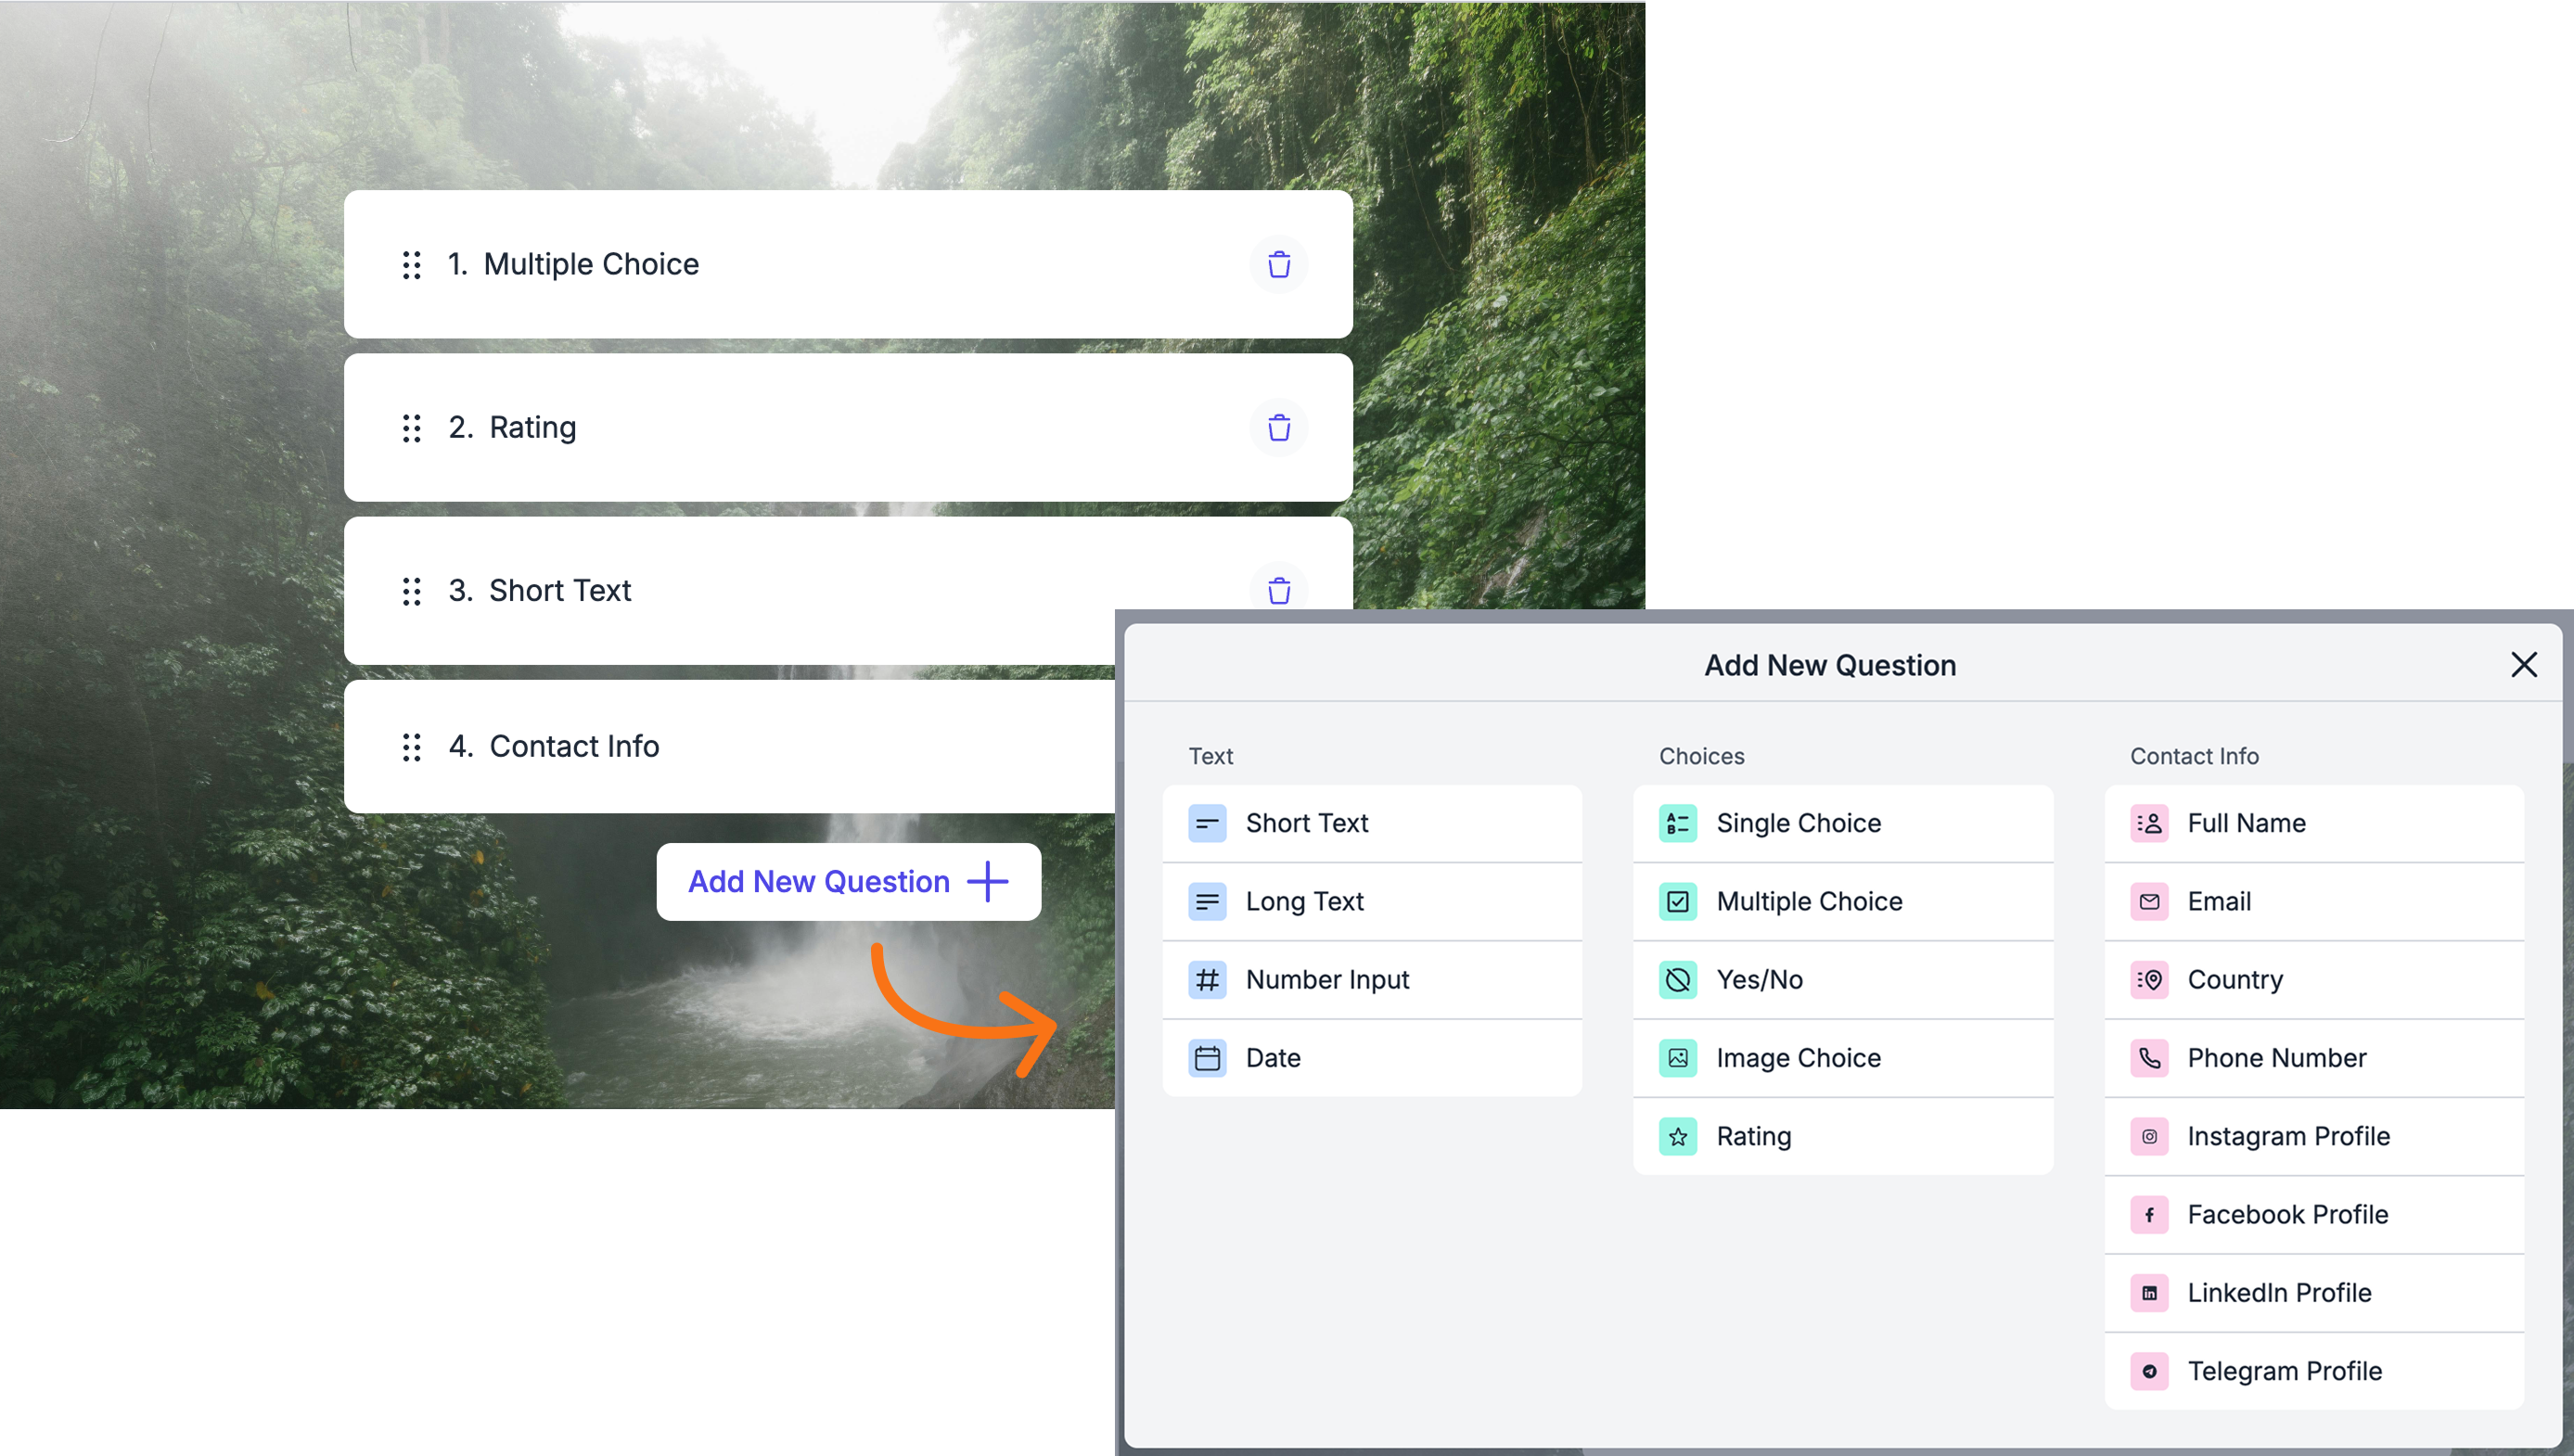
Choose question types:
Short or long text
Single & Multiple choice
Number, Date & time
Rating
SAGA integrated fields (e.g., Name, Email, Phone, Company). This will be filled in the contact information.
⚡ CRM-connected fields automatically update your Contact Page when a lead fills them in — no manual work needed.
You can:
Click on the questions to shrink or collapse them
Reorder questions with drag & drop
Remove them easily by clicking on the trash bin icon
Set the question as required or optional
When you’re done editing the form, click on “Confirm” in the bottom right.
🙏 5. Set Up the Thank You Page
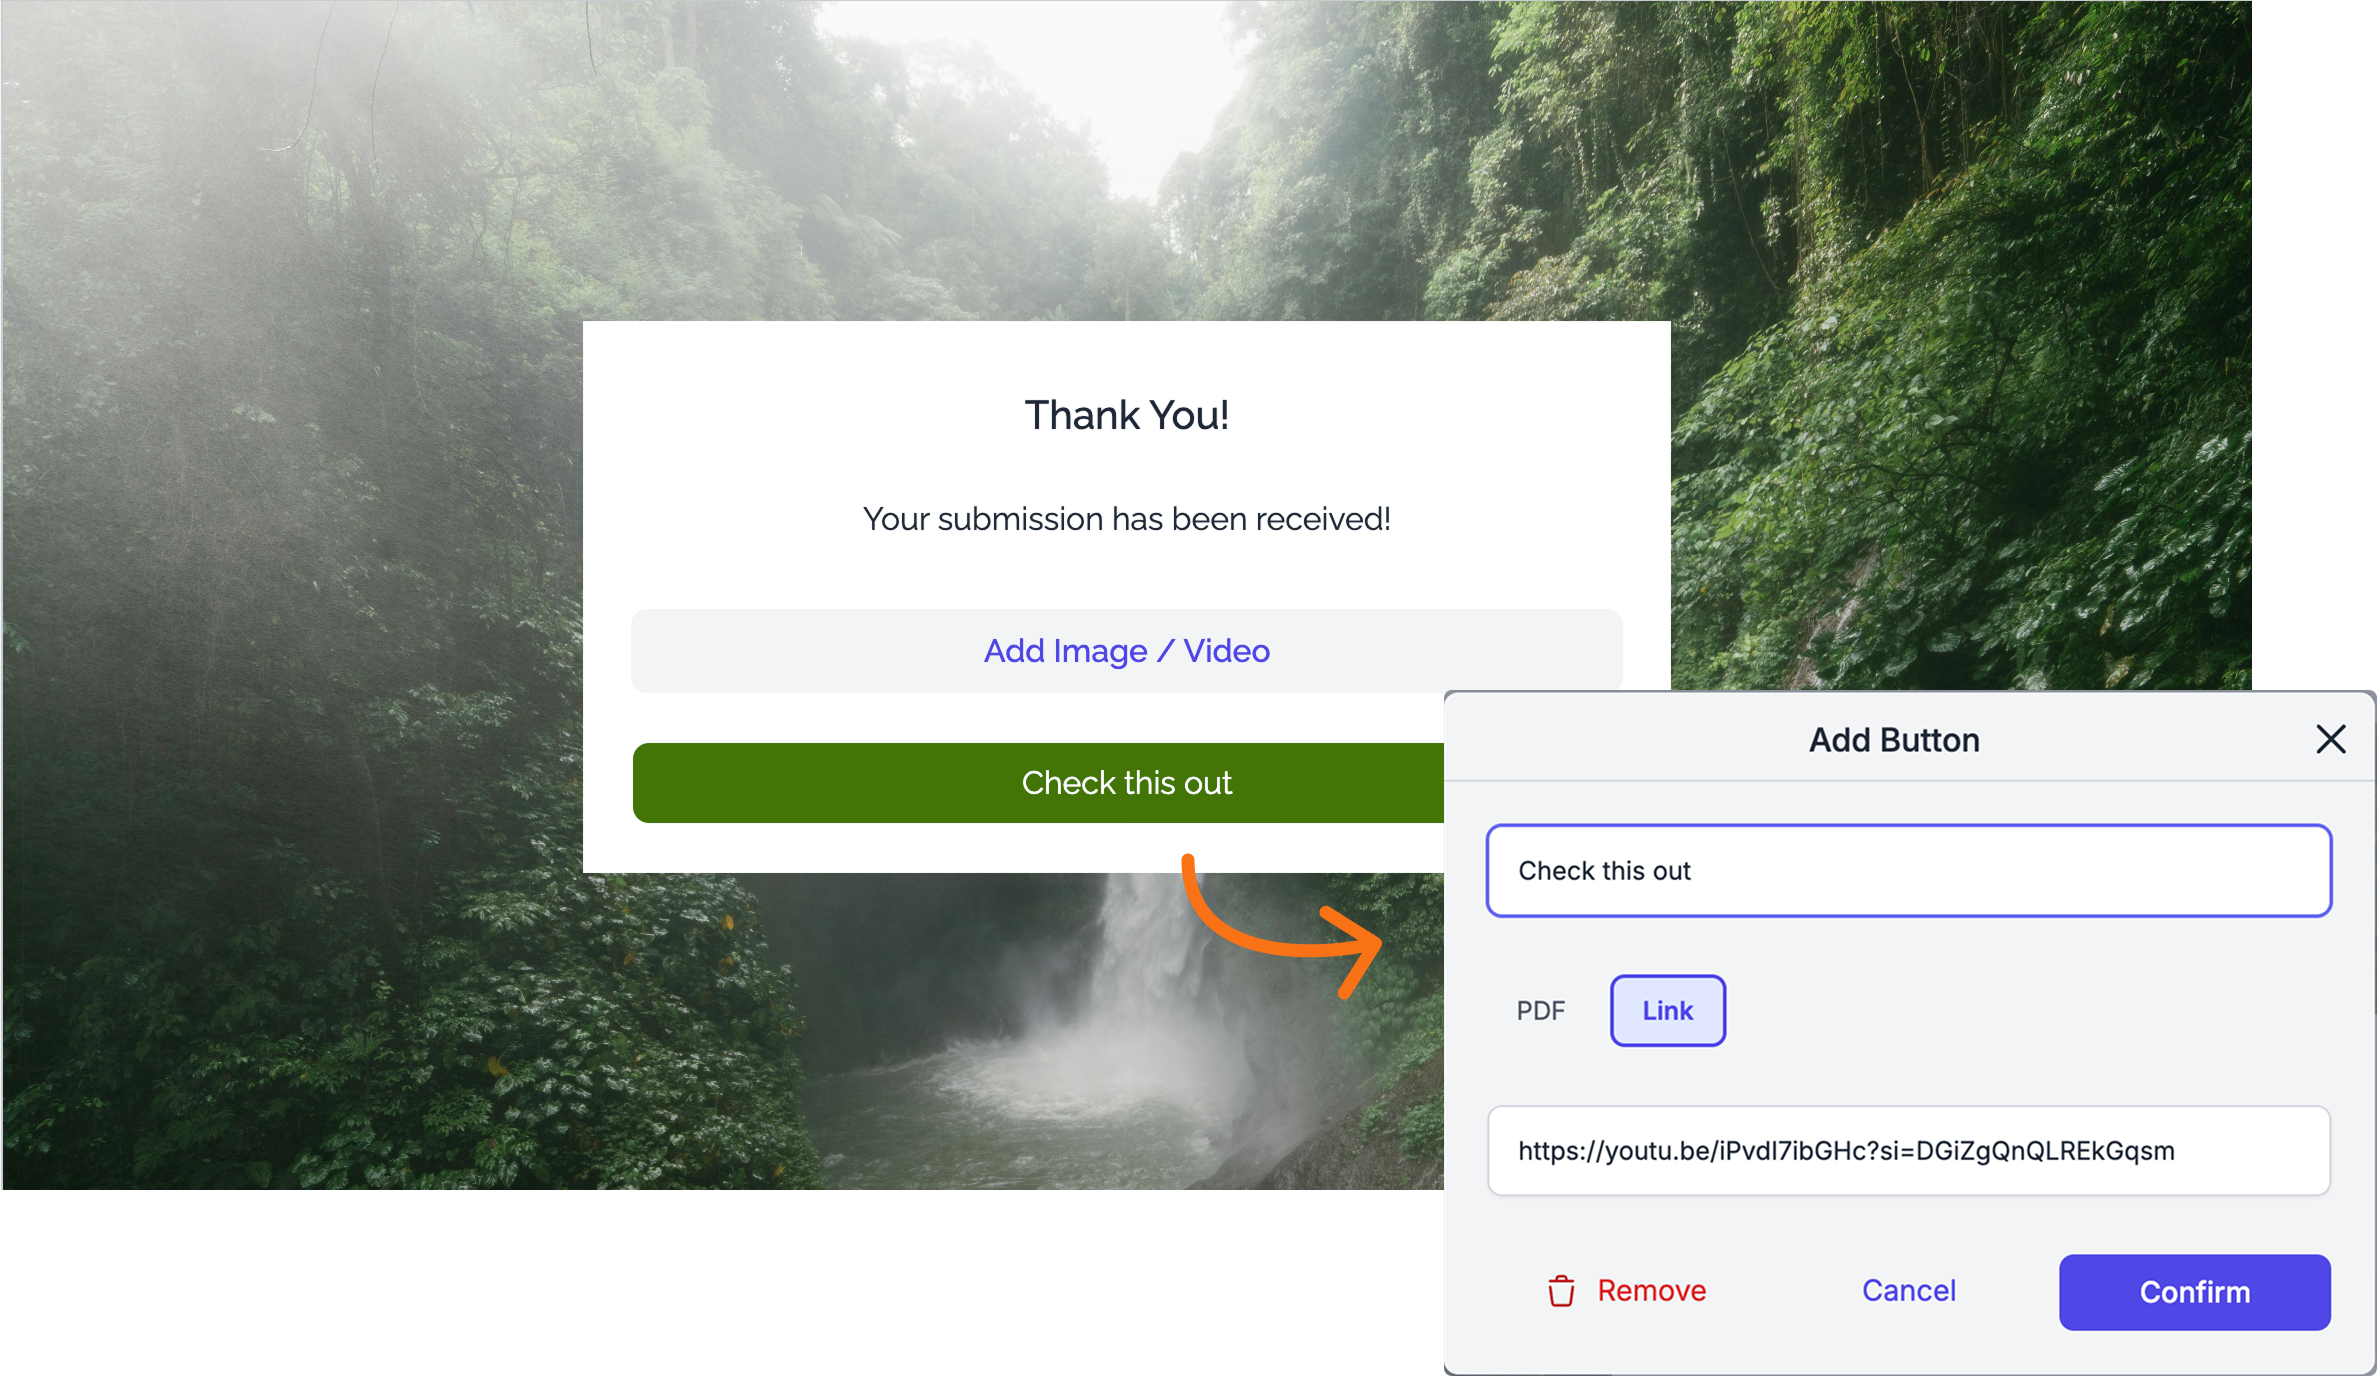
After users complete the form, they’ll land here.
You can:
Add a thank you message
Embed a video or image
Add a button linking to a page or a PDF
✉️ 6. Create an Email Sequence
Here you can edit the Email Sequence your leads will receive once they fill in the form.
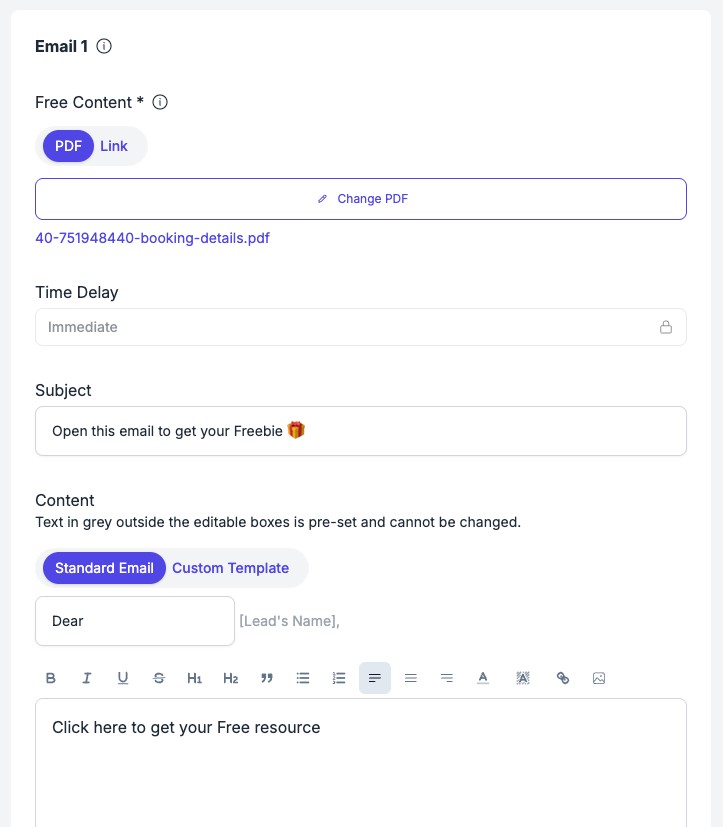
First Email:
In this email you’ll share the free content (freebie) with your leads. This will be sent immediately
Choose to deliver the freebie as a PDF or a Link (e.g., a board page).
Edit the subject line, email content, and button text in the email.
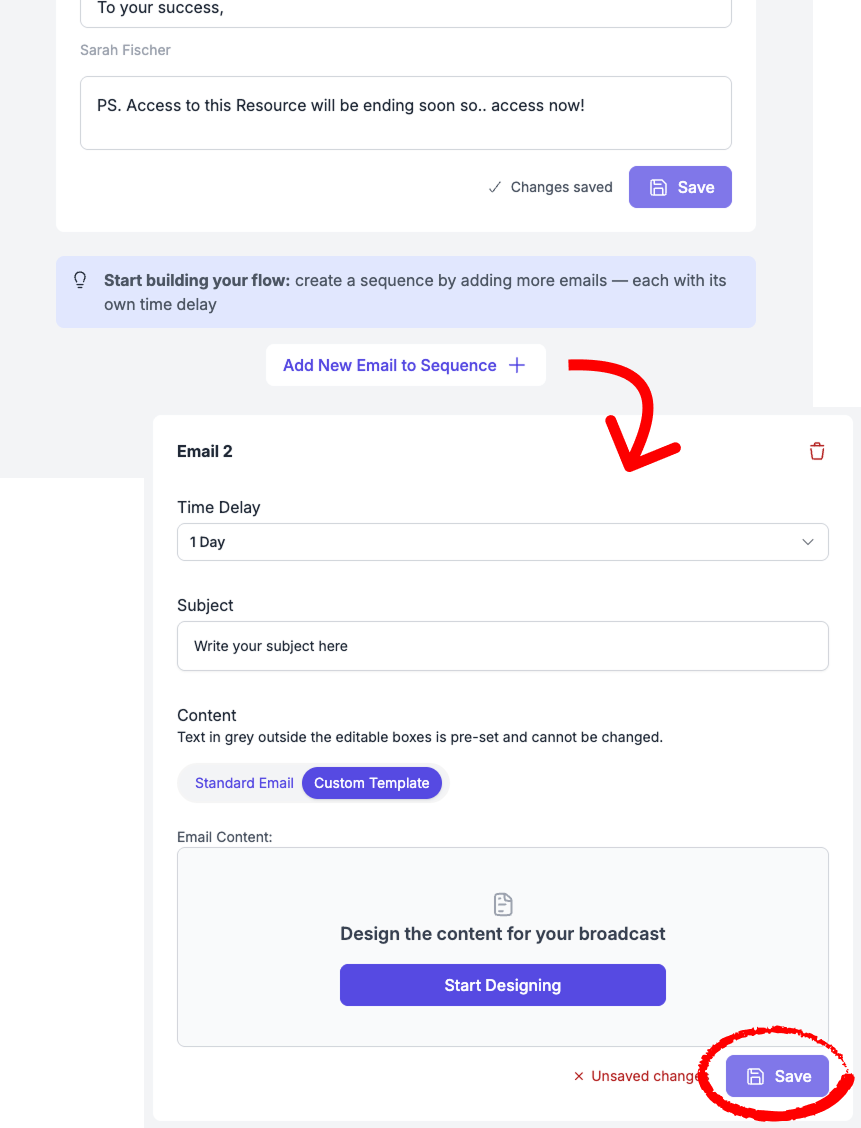
Optional Email Sequence:
You can choose to build a sequence of emails that will be sent automatically over time. This allows you to nurture your leads, provide extra value, or guide them toward a specific action.
You can add one or more emails to your sequence by clicking “Add email to sequence.”
You can set a delay time for each email. This delay is calculated from the moment the form is submitted (e.g. send two days after the contact has provided their information).
You can use our template builder to easily design professional-looking emails.
⚠️ Remember to click “Save” each time you edit an email to make sure your changes are applied.
🧭 7. Edit Anytime
You can always:
Return to the form
Update questions, theme, thank you page, or email flow
Relaunch your form without losing any data.
📊 8. Track Analytics & Results

Each form includes:
Views
Completions
Conversion Rate (CR)
You can also:
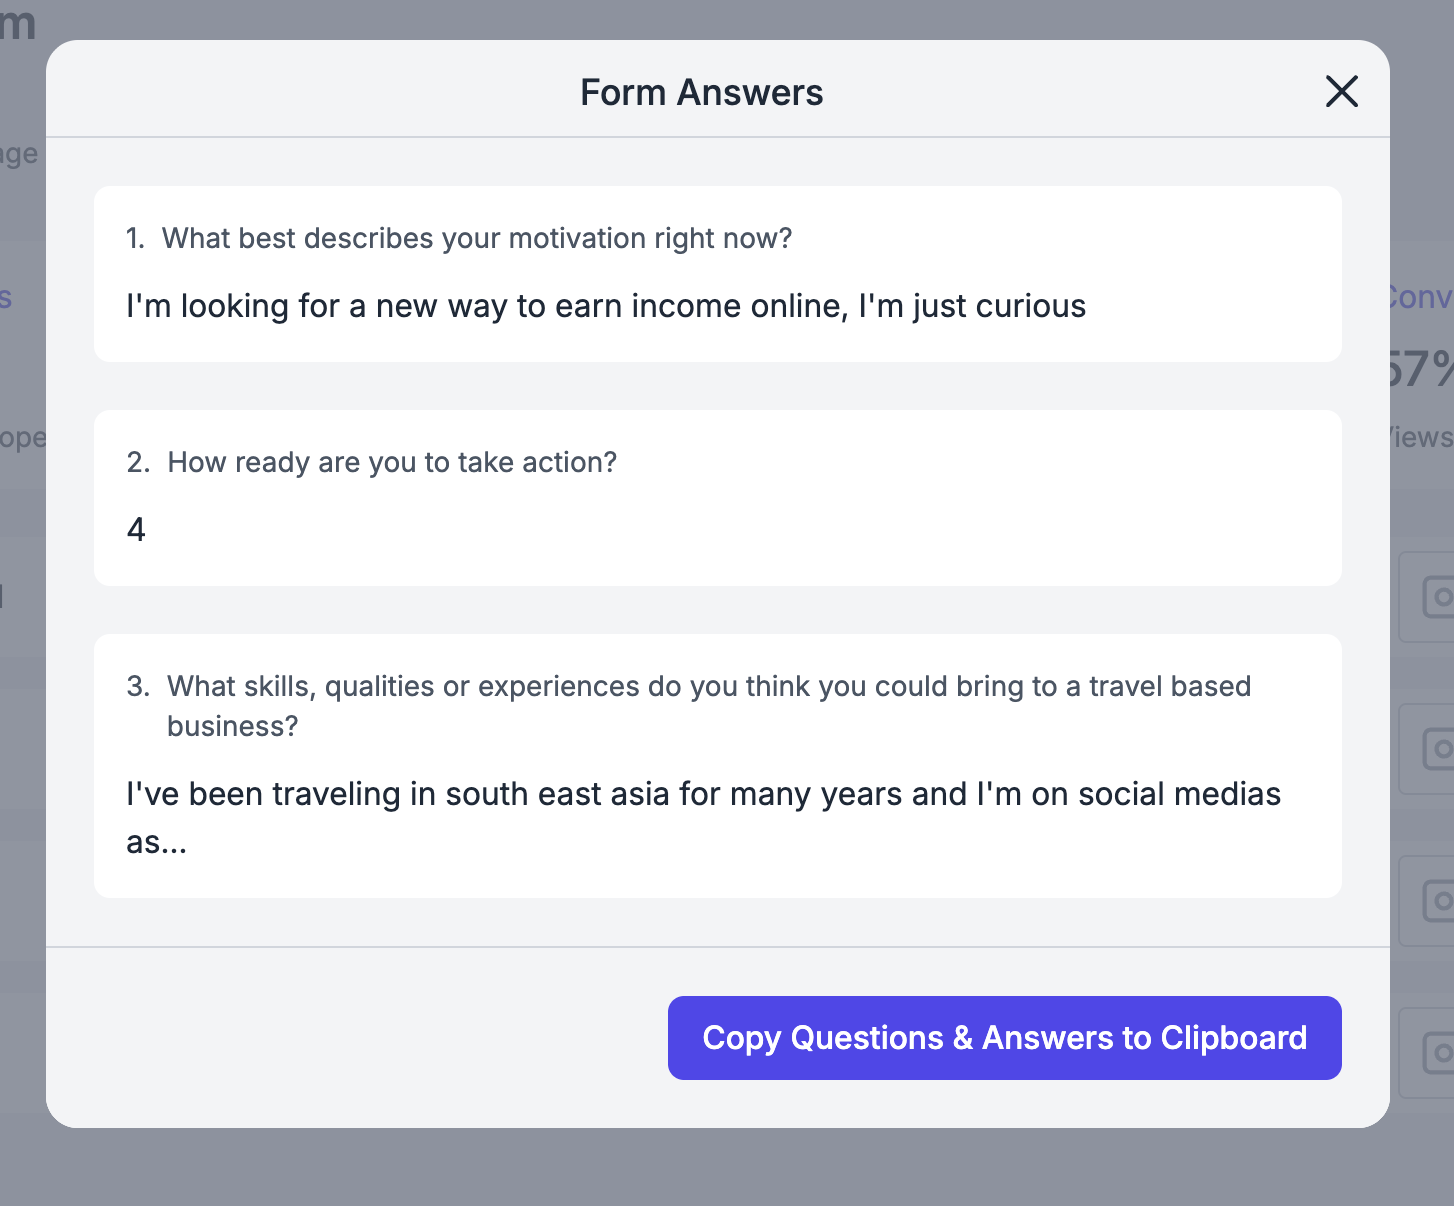
See the leads who answered
View their responses inside the Activity Panel of each contact
Copy questions and answers for use anywhere else.
💬 Need Help?
If you need assistance with creating your Link Mate or have questions about the process:
Support Center: Start a chat with the Fibi AI Agent in your SAGA. If they can’t help, a human team member will take over.
Book a Call: Schedule a demo with our team